Usage
Localization setup in Unreal Engine
Localizing your project is one of the most complicated tasks for any project. If you unfamiliar with localization in Unreal Engine, we highly encourage you to check out Unreal's official documentation.
The Tolgee plugin will re-use the default Unreal localization setup, so if you've already completed the process for your project, skip ahead to Tolgee Menu.
In the following sections, we will cover the most basic example and setup required to localize your project before using the Tolgee plugin.
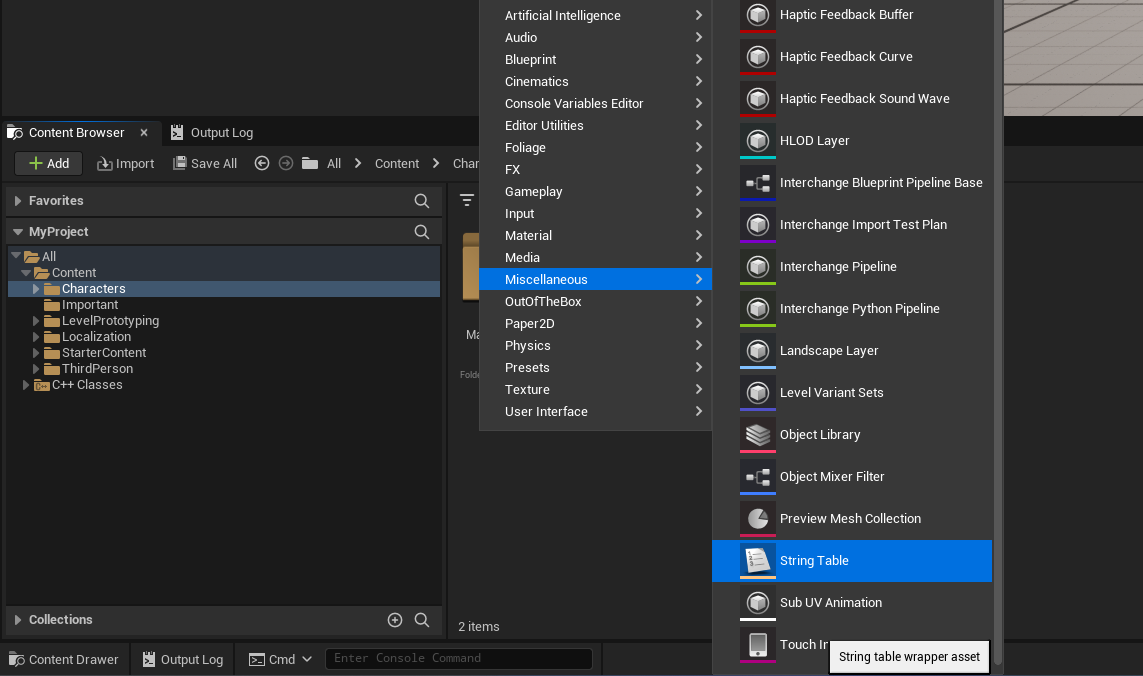
Step 1: Create a String Table asset
First and foremost we have to create a String Table. This is a special asset that can hold multiple localization keys. For this example, we will name it ST_MyCoolTable.
Note: The name of the asset will also be the name of the namespace for all the keys that will be added.
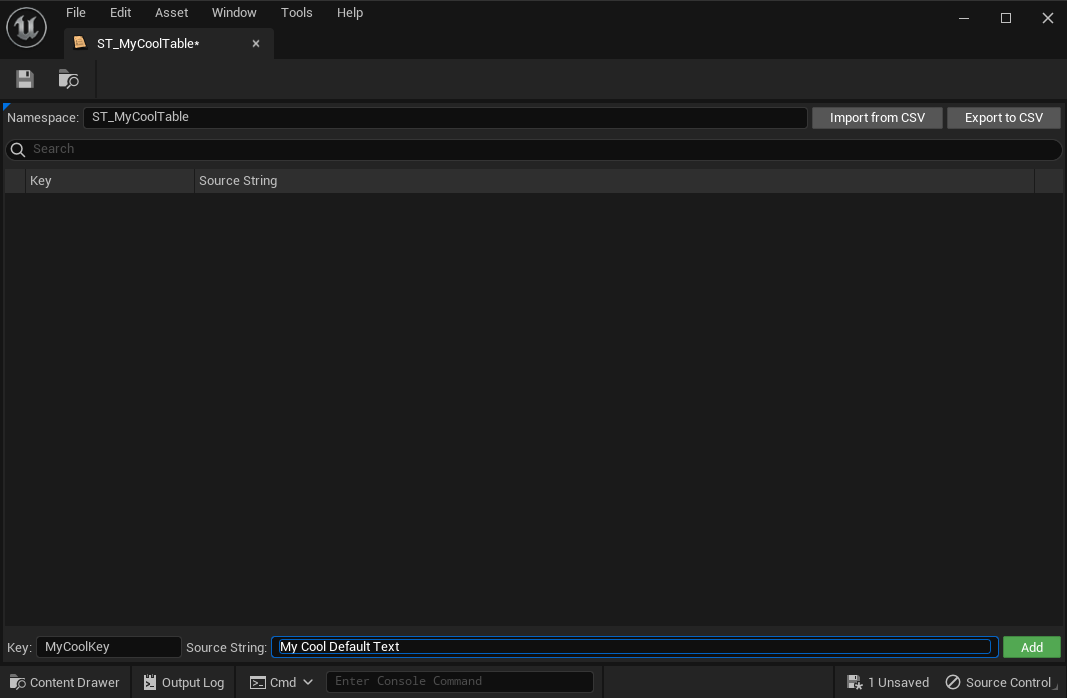
Step 2: Add your first key
Double-click the newly created asset to open it. You can add new translation keys at the bottom of the newly spawned editor.
To do so, you will have to provide a key name and a default translation (text to be used if no translation is provided).
For this example, we will be using MyCoolKey.
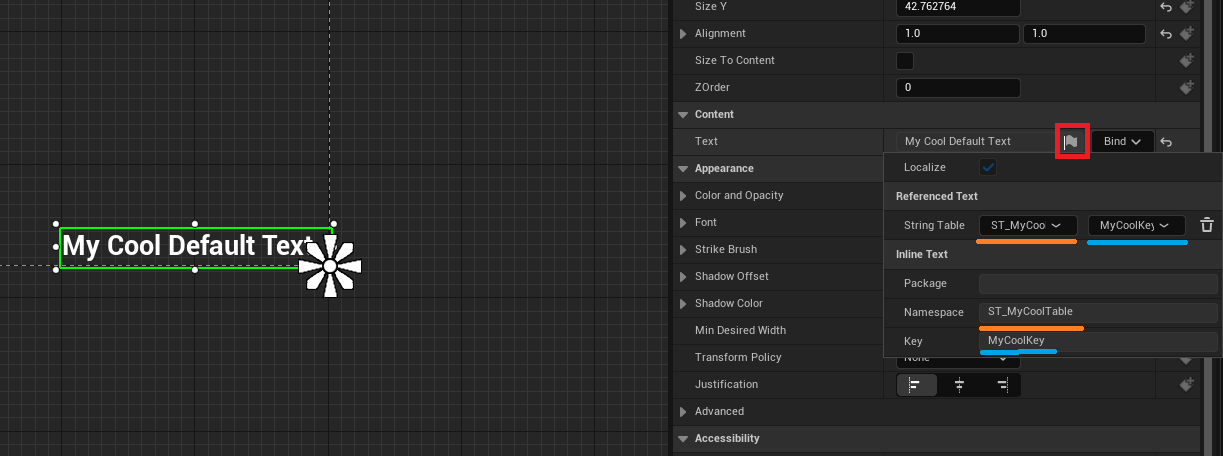
Step 3: Use your key (binding the key to an FText)
To use your newly created key, navigate to any Text (FText) variable and press the localization (flag) button.
This will open a small menu where you can select the string table (ST_MyCoolTable) and the key (MyCoolKey) you want to use.
In this example, we are binding the newly created key to a standard TextBlock inside a UserWidget Blueprint.
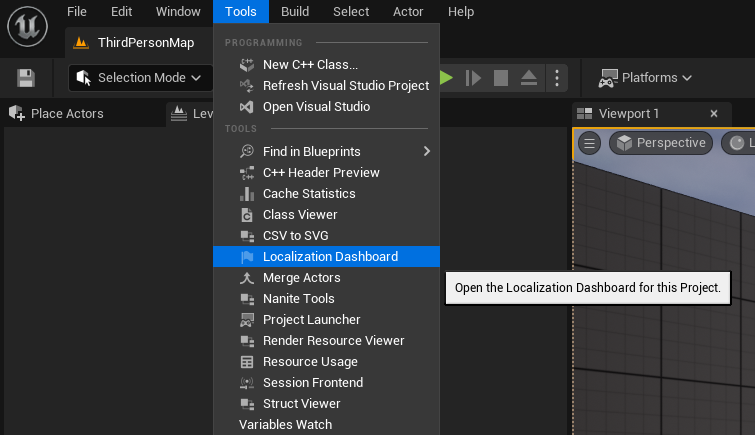
Step 4: Open the Localization Dashboard
Now that our Text variable is properly localized, we will need to set up the Localization Dashboard to pick up our newly created key.
Open the Localization Dashboard, which can be found under the Tools dropdown menu.
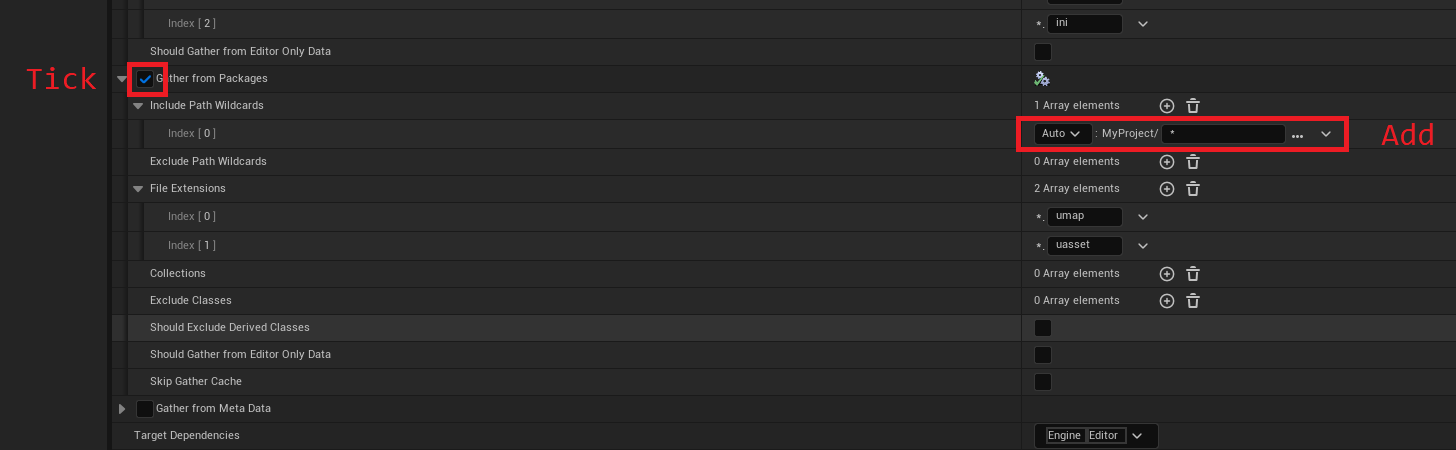
Step 5: Add your String Table asset to the gathering process
Now we need to set up the Localization Targets of the project to properly gather our string table asset.
Enable the Gather from Packages step and add a new entry inside the Include Path Wildcards with the * path.
Step 6: Set up the default culture
Finally, inside the Cultures section, press the radio button next to English to enable it as the default culture.

Tolgee Menu
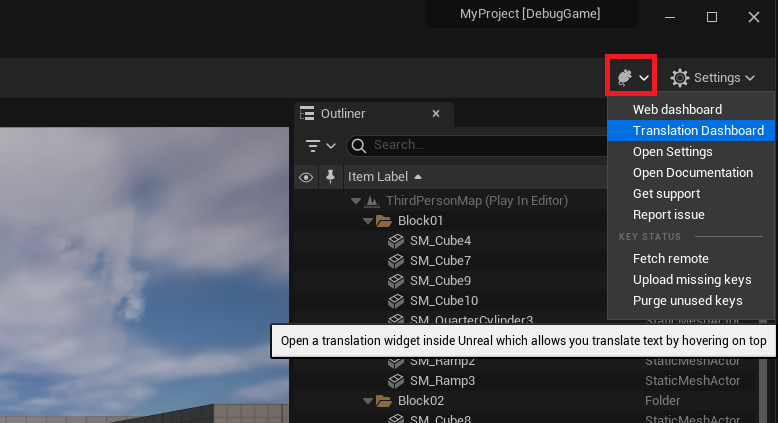
After enabling the Tolgee plugin and restarting the editor, the Tolgee icon should be visible in the upper right corner toolbar.
You can use this menu to access all the functionality available to you:
- launch the Tolgee Platform
- open the Tolgee Dashboard inside Unreal
- shortcuts to documentation, settings, and support (Slack)
- Uploading & Purging actions
Pushing texts from Unreal into Tolgee
One of the first actions you should perform is Upload missing keys. This will evaluate all the translation keys used in your project and upload them to the Tolgee Platform so you can start translating them.
Note: This action requires valid Localization Targets. If you haven't set those up yet, please refer to localization setup in Unreal Engine.
After the operation is complete, you can see all your namespaces and keys inside your Tolgee Dashboard.
Purging unused texts from Tolgee
As the project grows, it's common for keys to get deleted locally without having their linked key deleted from the project.
We added the Purge unused keys button to simplify the maintenance process. This will verify what keys from your Tolgee project are no longer used in your Unreal project and delete them.
Tolgee Dashboard – hover to translate
The best part of the Tolgee plugin is the Tolgee Dashboard. To open this window, press the Translation Dashboard button from your Integration Menu.
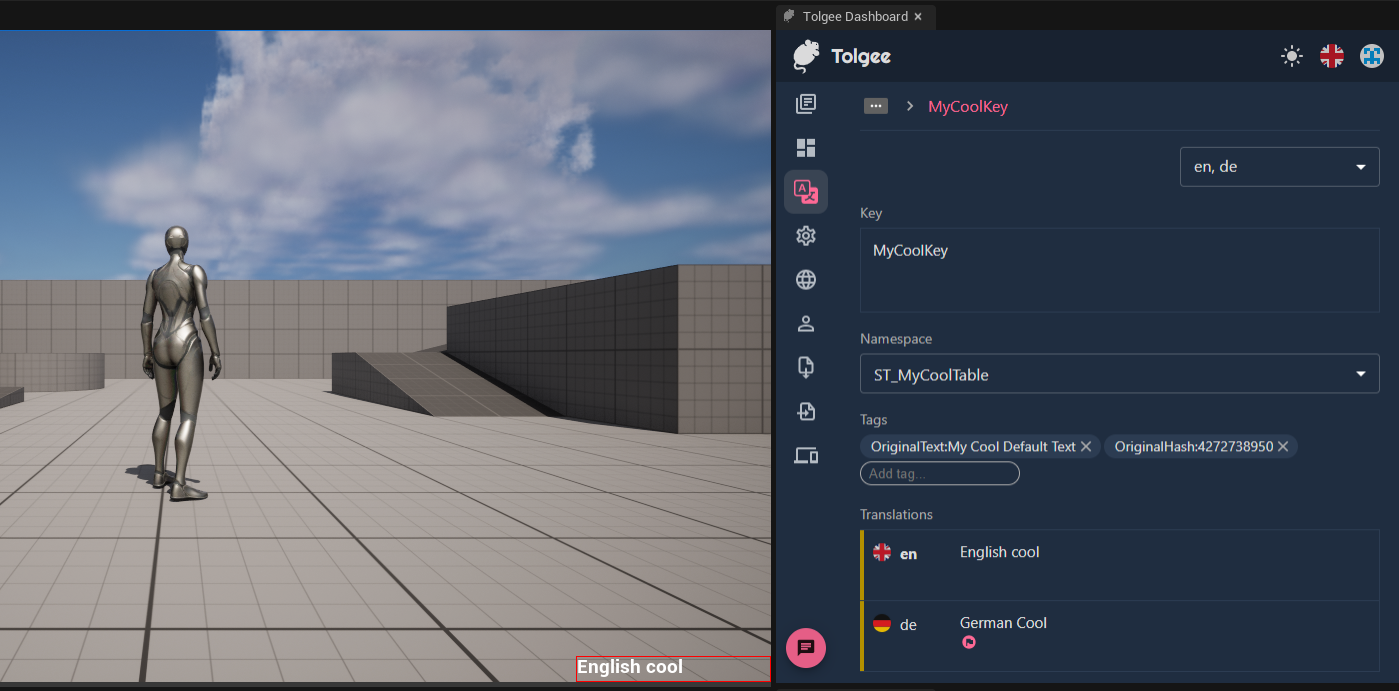
When this window is opened, it will highlight every TextBlock you hover in the UI and open the corresponding key in Tolgee to change the translation for that particular key.
After entering your desired translation, press Save, and the text will directly update at runtime.
Note: To use this functionality, you are required to log into your Tolgee account inside Unreal's browser.
Tolgee settings
Offline Translation Data
Our recommended approach is to embed the translation data in your final executable. To do so you will need to uncheck Live Translation Updates BEFORE starting the packaging process.
